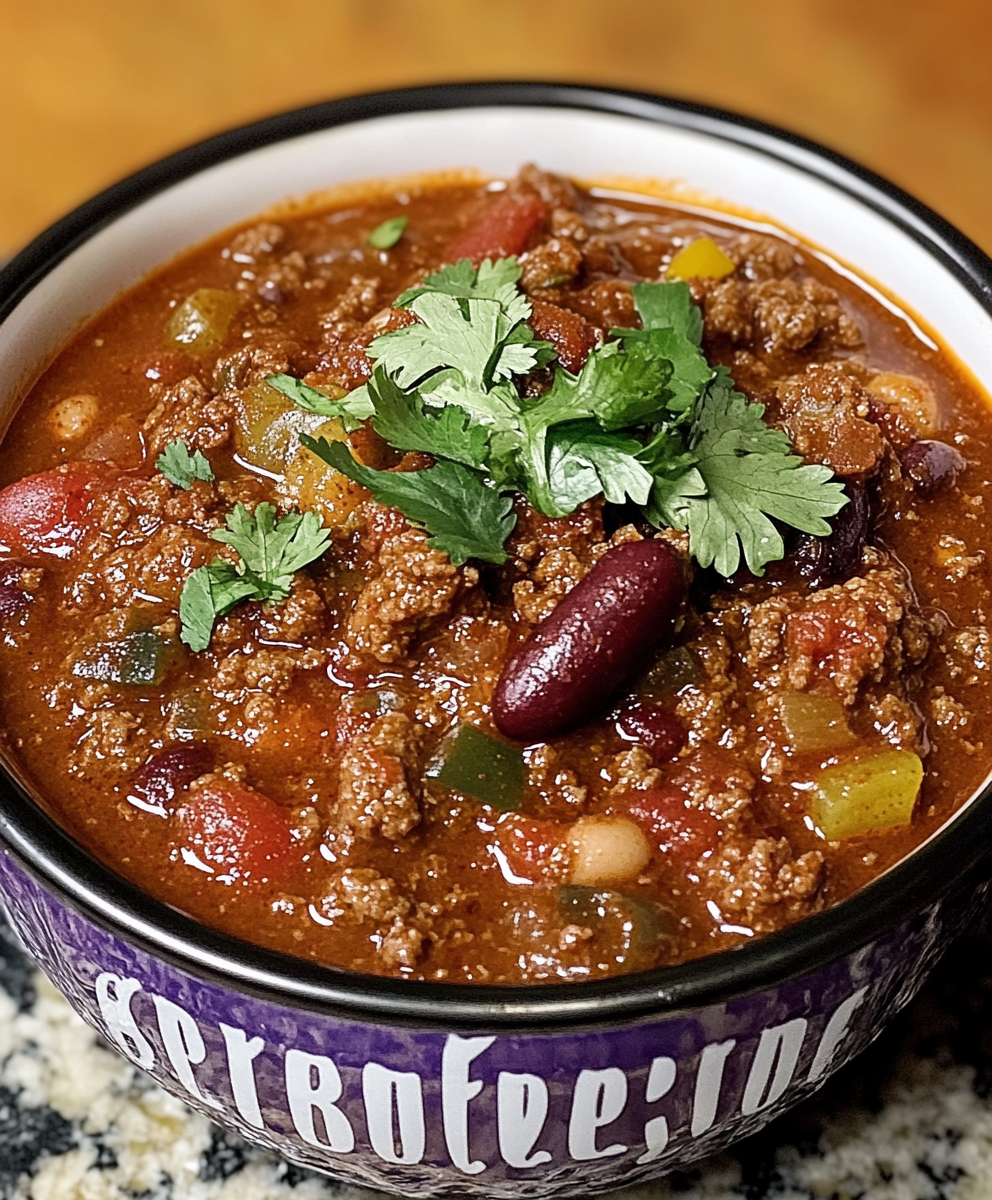
The Best Classic Chili Recipe

A comforting, no-fuss classic chili with ground beef, beans, and a homemade chili seasoning blend—easy, family-friendly, and ready in 30 minutes.
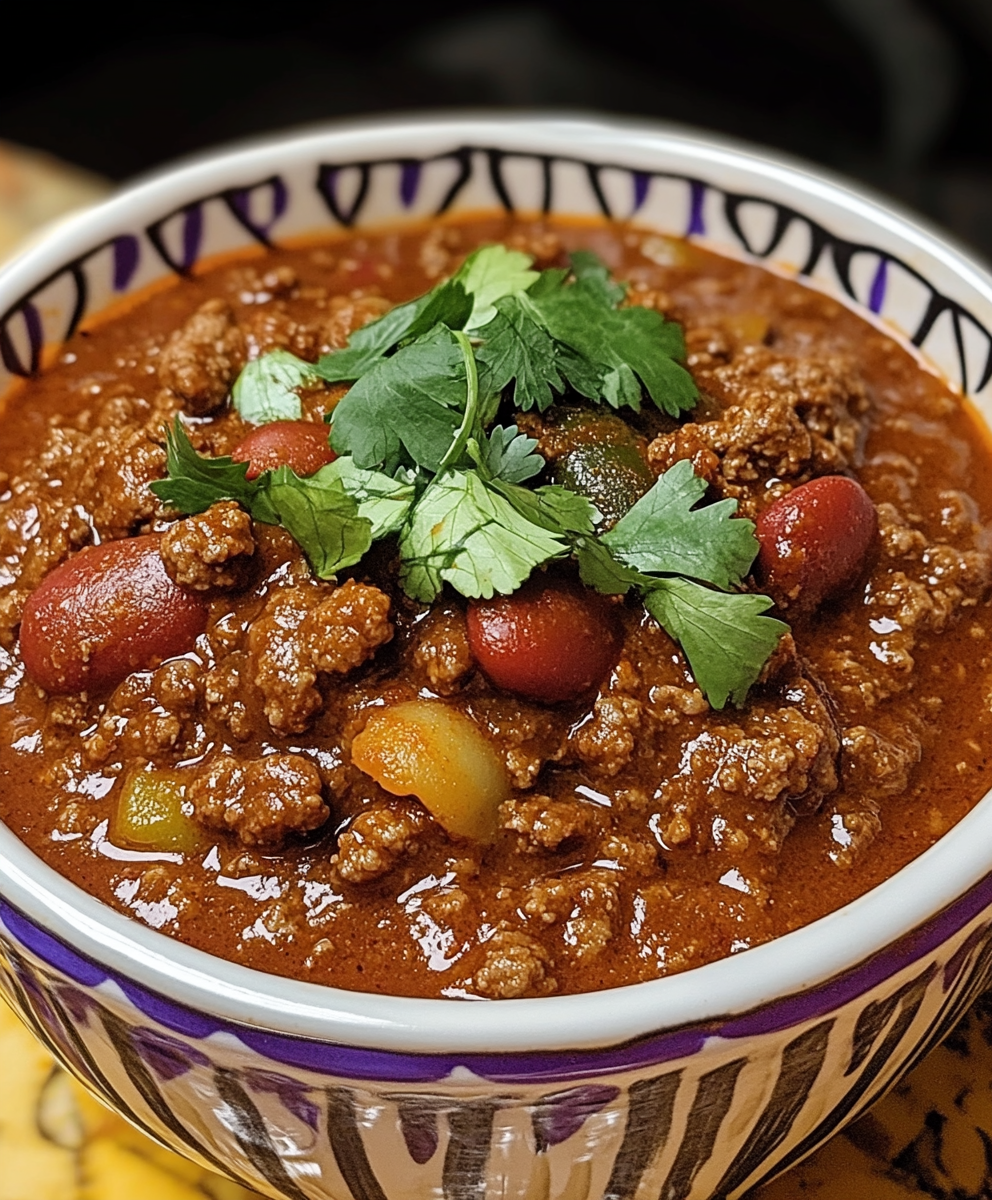
This classic chili is the kind of dinner that signals home: rich tomato and beef aroma, tender beans, and a warm, slightly smoky spice that corners of the family always flock for. I first perfected this version on a busy weeknight when I wanted big flavor without long simmering times. The mix of chili powder, cumin and a touch of sugar balances acidity and heat, while tomato paste and sauce add body so the chili isn’t thin or watery. It’s the kind of bowl that tastes like childhood and is forgiving enough for cooks of every skill level.
What makes this rendition special is the deliberate simplicity—straightforward ingredients, pantry-friendly cans, and a short simmer that still delivers a deep, satisfying profile. I often double it for gatherings, and it’s the recipe I reach for when I want something hearty, quick, and crowd-pleasing. Taste-wise it’s robust but approachable: savory beef, mellow onion, rounded tomato, and a warm spice backbone. Texture is important here—bite from the beans, softness from the tomatoes, and a meaty chew from 90% lean ground beef, trimmed and browned just right.
Why You'll Love This Recipe
- Ready in just 30 minutes: active prep is only about 5 minutes and a 25-minute simmer, perfect for busy weeknights and impromptu guests.
- Uses pantry staples: canned tomatoes, tomato sauce, beans, and common spices make it ideal for last-minute cooking without special shopping trips.
- Family-tested and adaptable: mild enough for kids but easy to spice up with cayenne or hot sauce for adults.
- Make-ahead and freezer-friendly: it deepens in flavor after a day in the fridge and freezes well for quick reheats later.
- Balanced nutrition: hearty protein from beef and fiber from beans make it a filling one-pot meal that satisfies a crowd.
- Simple technique, big results: basic sautéing and simmering unlock rich flavors without complicated steps or equipment.
I first made this bowl for a blustery fall soccer night back when my crew still requested simple comfort foods. Everyone cleaned their bowls, and I learned that a touch of sugar and tomato paste makes a huge difference in rounding acidity. Over time I adjusted spice levels for our family—skipping cayenne for the little one and letting adults add heat at the table. It’s become our quick-dinner champion because it’s forgiving and reliably delicious.
Ingredients
- Olive oil: 1 tablespoon. Use a good extra-virgin olive oil for flavor; it sautés the onion without burning and adds a subtle fruitiness.
- Yellow onion: 1 medium, diced. Choose a firm, sweet yellow onion (like Vidalia when in season) for its mild, caramelizing qualities.
- Ground beef: 1 pound of 90% lean. This offers a good balance of flavor and lower fat; if you prefer richer chili, use 80/20 and drain excess fat.
- Chili powder: 2 1/2 tablespoons. McCormick is a safe, flavorful brand with moderate heat; adjust amount to taste as brands vary widely.
- Ground cumin: 2 tablespoons. Toasted, earthy cumin deepens the chili’s warmth—freshly ground is ideal if you have a spice grinder.
- Granulated sugar: 2 tablespoons. Balances tomato acidity; if you use sweet canned tomatoes, reduce slightly.
- Tomato paste: 2 tablespoons. Adds concentrated tomato flavor and thickens the liquid.
- Garlic powder: 1 tablespoon. For quick consistency; substitute 2 cloves minced fresh garlic if preferred.
- Salt & pepper: 1 1/2 teaspoons salt and 1/2 teaspoon ground black pepper. Season gradually and adjust at the end.
- Cayenne pepper (optional): 1/4 teaspoon. For heat—leave out for kids and add to bowls for adults if desired.
- Beef broth: 1 1/2 cups. Use low-sodium if you’re monitoring salt; beef broth adds depth over water.
- Petite diced tomatoes: 1 (15 oz) can. Provides tomato pieces and juice for texture and acidity.
- Red kidney beans: 1 (16 oz) can, drained and rinsed. Canned beans save time; rinsing removes excess sodium and starch.
- Tomato sauce: 1 (8 oz) can. Smooths and binds the chili, creating that familiar thick, spoonable body.
Instructions
Heat the pot and sauté onion: Set a large soup pot over medium-high heat and add 1 tablespoon olive oil. Warm for about 2 minutes until the oil shimmers but does not smoke. Add the diced yellow onion and cook for 5 minutes, stirring occasionally, until softened and slightly translucent. Watch the edges for light browning—this adds flavor but avoid burning. Brown the beef: Add 1 pound 90% lean ground beef to the pot. Use a wooden spoon to break it into small pieces. Cook for 6–7 minutes, stirring occasionally, until the beef is evenly browned and no pink remains. If excess fat accumulates, carefully spoon a little off; for leaner beef there will be little to drain. Add the spice blend: Stir in 2 1/2 tablespoons chili powder, 2 tablespoons ground cumin, 2 tablespoons granulated sugar, 2 tablespoons tomato paste, 1 tablespoon garlic powder, 1 1/2 teaspoons salt, 1/2 teaspoon ground black pepper, and 1/4 teaspoon cayenne if using. Mix thoroughly so the tomato paste and spices coat the meat—this toasts the spices slightly and awakens their aroma. Combine liquids and beans: Pour in 1 1/2 cups beef broth, the 15 oz can of petite diced tomatoes with juice, the drained and rinsed 16 oz can of red kidney beans, and the 8 oz can of tomato sauce. Stir until everything is evenly distributed and the tomato paste dissolves into the liquid. Simmer gently: Bring the mixture to a low boil, then reduce heat to low or medium-low so the pot maintains a gentle simmer. Cook uncovered for 20–25 minutes, stirring occasionally to prevent sticking. Look for a thickened sauce and tender beans; the aroma should be rich and slightly sweet from the sugar and tomato paste. Rest and serve: Remove the pot from heat and let the chili rest for 5–10 minutes before serving. This rest lets flavors meld and the chili thicken slightly. Taste and adjust salt, pepper, or heat before plating.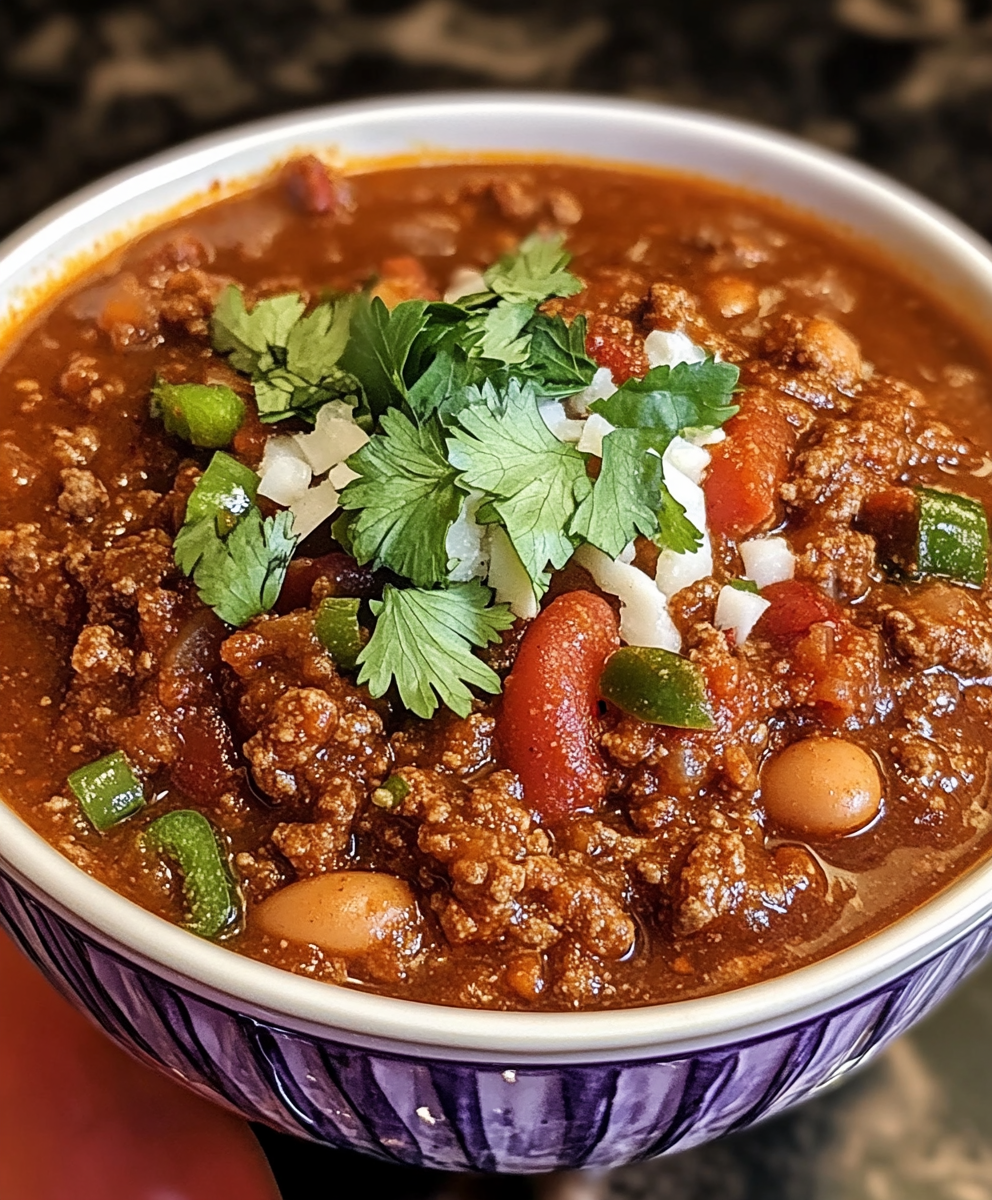
You Must Know
- This chili stores well in the refrigerator for up to 4 days and freezes for up to 3 months in airtight containers—label portions before freezing for easy reheats.
- Calories per serving are approximately 334 kcal with about 25 g protein and 34 g carbohydrates, making it a balanced, filling meal.
- Beans add fiber and texture; drain and rinse to reduce sodium and remove the packing liquid’s starchiness.
- Spice levels vary by chili powder brand—start with less and adjust. Keep cayenne optional for family-friendly preparation.
My favorite part of this dish is how it deepens overnight: leftovers taste even richer because the spices and tomato components have time to marry. The family always asks for reheats the next day, and I’ve brought this pot to potlucks where it disappears fast. A squeeze of lime or a dollop of sour cream at the table personalizes each bowl.
Storage Tips
Store cooled chili in airtight glass or BPA-free plastic containers. In the refrigerator it keeps well for up to 4 days; for longer storage, freeze in portion-sized containers for 2–3 months. To reheat, thaw overnight in the fridge or use the defrost setting on your microwave, then warm gently on the stovetop over low heat to avoid scorching. Add a splash of beef broth or water if the chili has thickened too much. When reheating from frozen, use a low simmer and stir frequently to restore texture.
Ingredient Substitutions
If you prefer a lighter version, substitute ground turkey or chicken for the beef—brown it the same way but watch for drier texture and add a tablespoon of olive oil while cooking. For a vegetarian option, replace the beef with 16 oz of extra-firm crumbled tofu or a medley of mushrooms, and swap beef broth for vegetable broth. If you dislike kidney beans, use black beans or pinto beans; reduce sugar slightly if using sweeter canned tomatoes. Fresh garlic (2 cloves) can replace garlic powder for brighter flavor.
Serving Suggestions
Serve the chili with classic toppings like shredded cheddar, diced red onion, chopped cilantro, sour cream, and sliced jalapeños. It pairs well with cornbread, steamed rice, or baked potatoes for hearty bowls. For a lighter meal, spoon chili over a bed of greens for a warm salad. At gatherings, provide hot sauce, pickled jalapeños, and lime wedges for guests to customize heat and acidity.
Cultural Background
This style of chili blends Tex-Mex and Midwestern home-cooking traditions—ground beef and beans became common in American households during the 20th century when canned goods and affordable meat made hearty stews accessible. While purists in Texas argue that true chili contains no beans, the bean-and-beef version became a beloved family classic across the United States for its affordability and comforting texture. Variations across regions highlight different spice blends and pepper types.
Seasonal Adaptations
In winter, enrich the chili with roasted winter peppers or a splash of stout beer for deeper flavor. In summer, lighten it by using fresh fire-roasted tomatoes and adding grilled corn near the end. Around holiday gatherings, offer bowls with garnishes like avocado and lime to keep the menu bright and fresh. For autumn, fold in small diced sweet potato for an earthy sweetness that pairs beautifully with cumin.
Meal Prep Tips
Make a double batch and portion into 2–3 cup containers for easy lunches. Cool completely before sealing to prevent condensation, which can affect texture. Freeze individual portions flat in freezer bags to save space and thaw quickly under cold running water or in the fridge overnight. Pack toppings separately so salads and reheats remain fresh—cheese can be sliced or grated and stored in small containers.
This simple, family-friendly chili is a reliable weeknight winner that scales well, freezes beautifully, and welcomes personalization. Share it with friends, tweak the heat to taste, and make it your own—there’s always room at our table for one more bowl.
Pro Tips
Rinse canned beans thoroughly to reduce sodium and remove packing starch.
Toast whole spices in a dry skillet for 30 seconds before grinding to boost aroma if using whole cumin.
Let the chili rest for 5–10 minutes off the heat so it thickens and flavors meld before serving.
Adjust chili powder by starting with less: brands vary widely in heat level.
This nourishing the best classic chili recipe recipe is sure to be a staple in your kitchen. Enjoy every moist, high protein slice — it is perfect for breakfast or as a wholesome snack any time.
FAQs about Recipes
How long does the chili last in the fridge?
Yes. Refrigerate in an airtight container for up to 4 days. Reheat gently on the stovetop and add a little beef broth if needed.
Can I freeze the chili?
Freeze in portion-sized containers for up to 3 months. Thaw overnight in the fridge before reheating.
Tags
The Best Classic Chili Recipe
This The Best Classic Chili Recipe recipe makes perfectly juicy, tender, and flavorful steak every time! Serve with potatoes and a side salad for an unforgettable dinner in under 30 minutes.
Ingredients
Main
Instructions
Sauté the onion
Heat a large soup pot over medium-high and add 1 tablespoon olive oil. After about 2 minutes, add the diced onion and cook for 5 minutes until softened and slightly translucent, stirring occasionally.
Brown the beef
Add 1 pound ground beef and break it apart with a wooden spoon. Cook for 6–7 minutes until fully browned and no pink remains. Drain excess fat if necessary.
Add the spices
Stir in chili powder, cumin, sugar, tomato paste, garlic powder, salt, pepper, and optional cayenne. Mix until the paste and spices coat the meat and become aromatic.
Combine liquids and beans
Add 1 1/2 cups beef broth, the can of petite diced tomatoes with juice, drained kidney beans, and the can of tomato sauce. Stir well to combine.
Simmer
Bring to a low boil, then reduce heat to low or medium-low and simmer uncovered for 20–25 minutes, stirring occasionally until thickened.
Rest and serve
Remove from heat and let rest for 5–10 minutes so flavors meld. Adjust seasoning to taste and serve with desired toppings.
Last Step: Please leave a rating and comment letting us know how you liked this recipe! This helps our business to thrive and continue providing free, high-quality recipes for you.
Nutrition
Did You Make This?
Leave a comment & rating below or tag
@sararecipes on social media!
Categories:
You might also like...
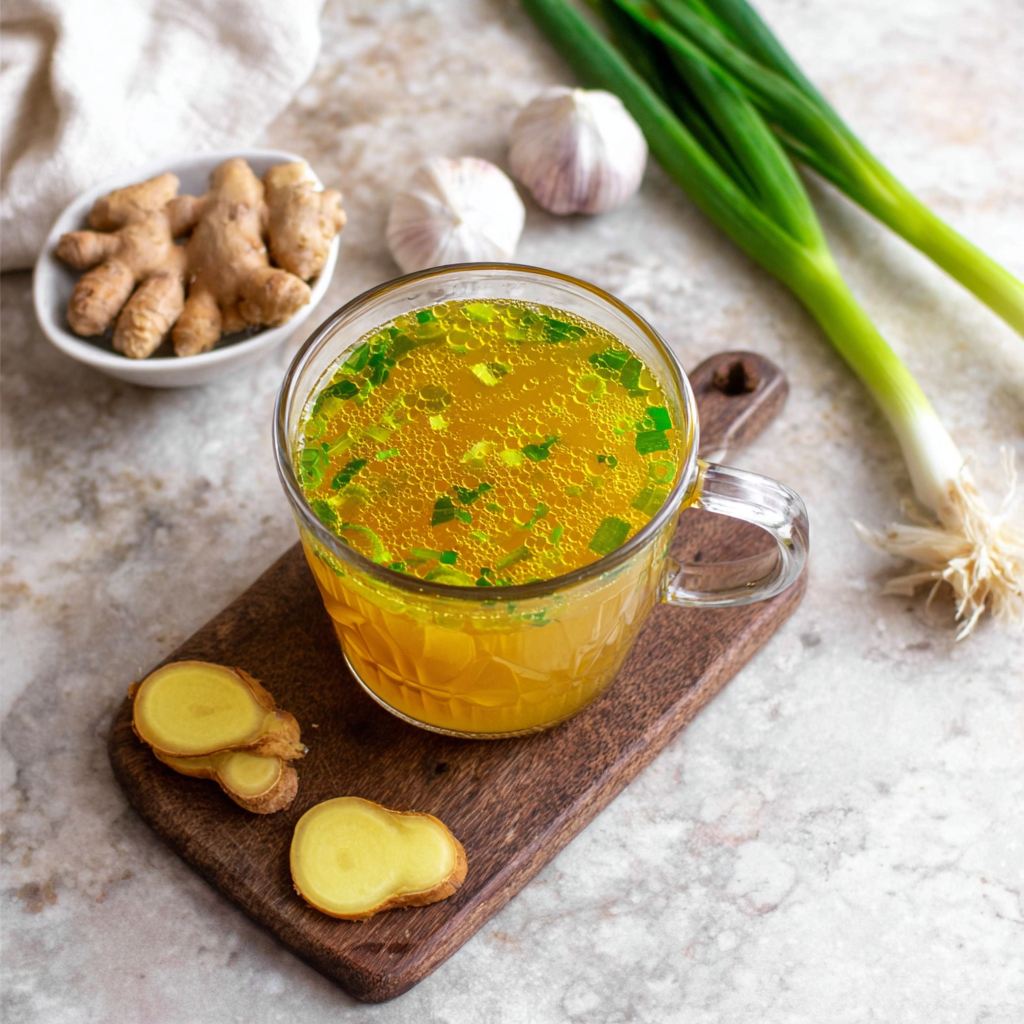
10 Minute Immune Boosting Broth
A bright, restorative broth ready in ten minutes—packed with garlic, ginger, miso and turmeric to support immunity and soothe the soul.
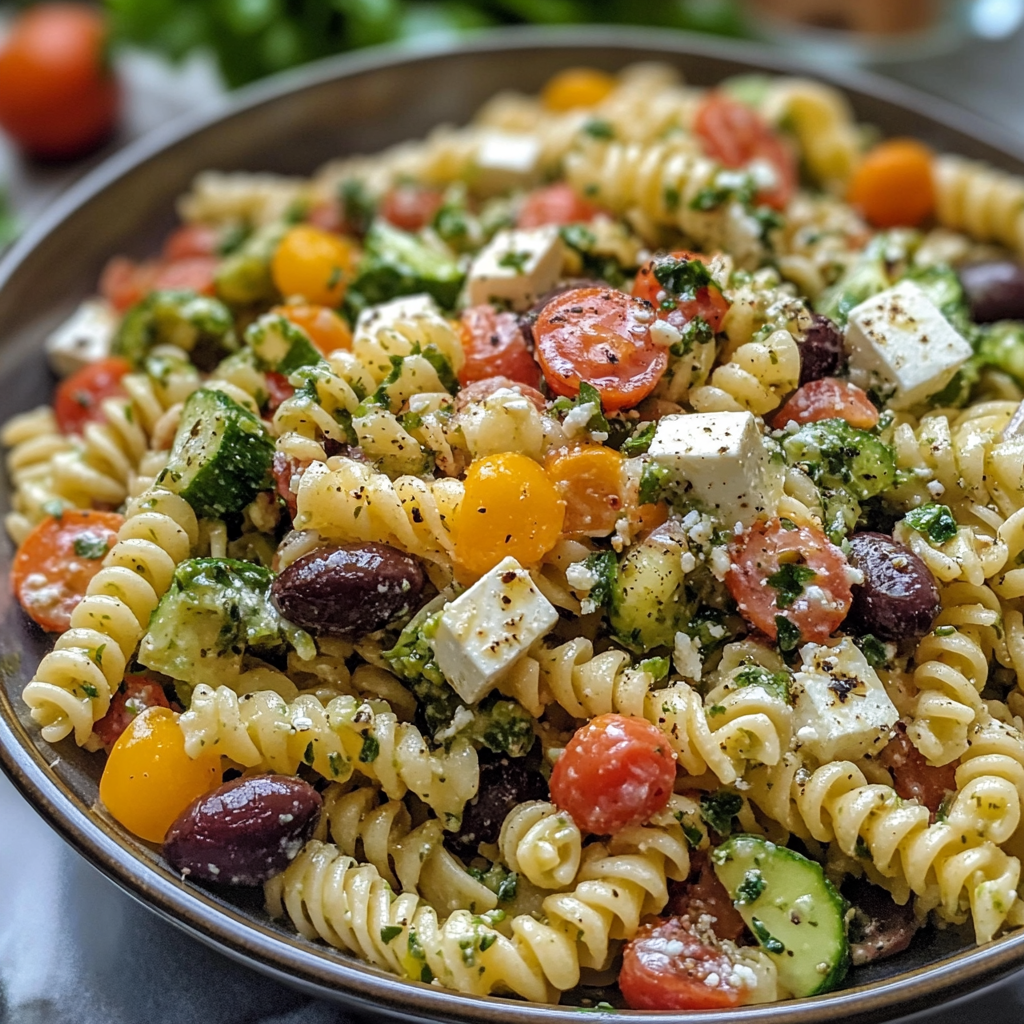
20-Minute Greek Pasta Salad
A bright, 20-minute Greek pasta salad loaded with crisp cucumber, cherry tomatoes, Kalamata olives, feta, and a tangy tzatziki vinaigrette — perfect for summer gatherings or easy meal prep.

Air Fryer Bang Bang Salmon Bites
Crispy-tender salmon bites tossed in a creamy, sweet-spicy bang bang sauce — ready in about 20 minutes using an air fryer or oven.
Did You Make This?
Leave a comment & rating below or tag @sararecipes on social media!
Rate This Recipe
Share This Recipe
Enjoyed this recipe? Share it with friends and family, and don't forget to leave a review!
Comments (1)
This recipe looks amazing! Can't wait to try it.
Comments are stored locally in your browser. Server comments are displayed alongside your local comments.
Hi, I'm Sara!
What's Popular
30-Minute Meals!
Join to receive our email series which contains a round-up of some of our quick and easy family favorite recipes.