
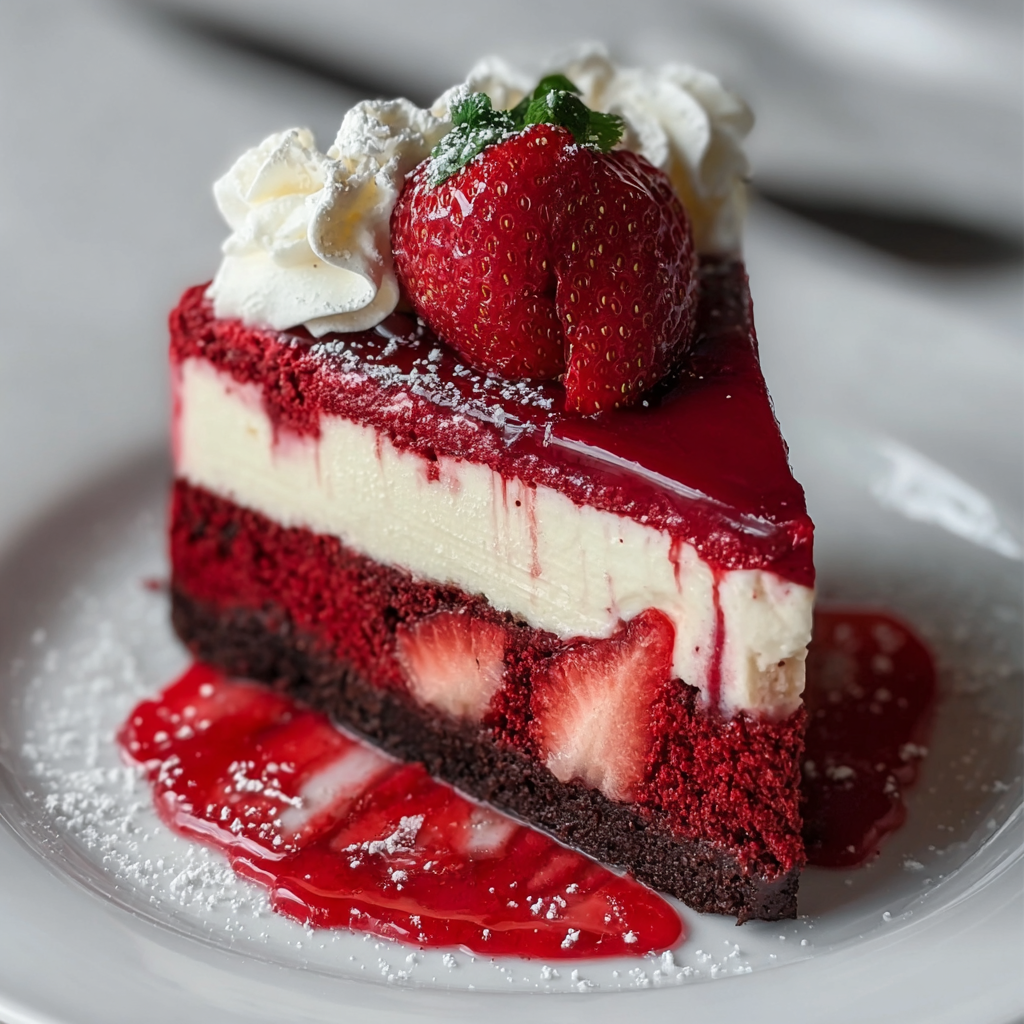
Red Velvet Strawberry Cheesecake

A show-stopping layered dessert: moist red velvet base topped with a light, fruity strawberry cheesecake layer and fresh berries — perfect for celebrations.
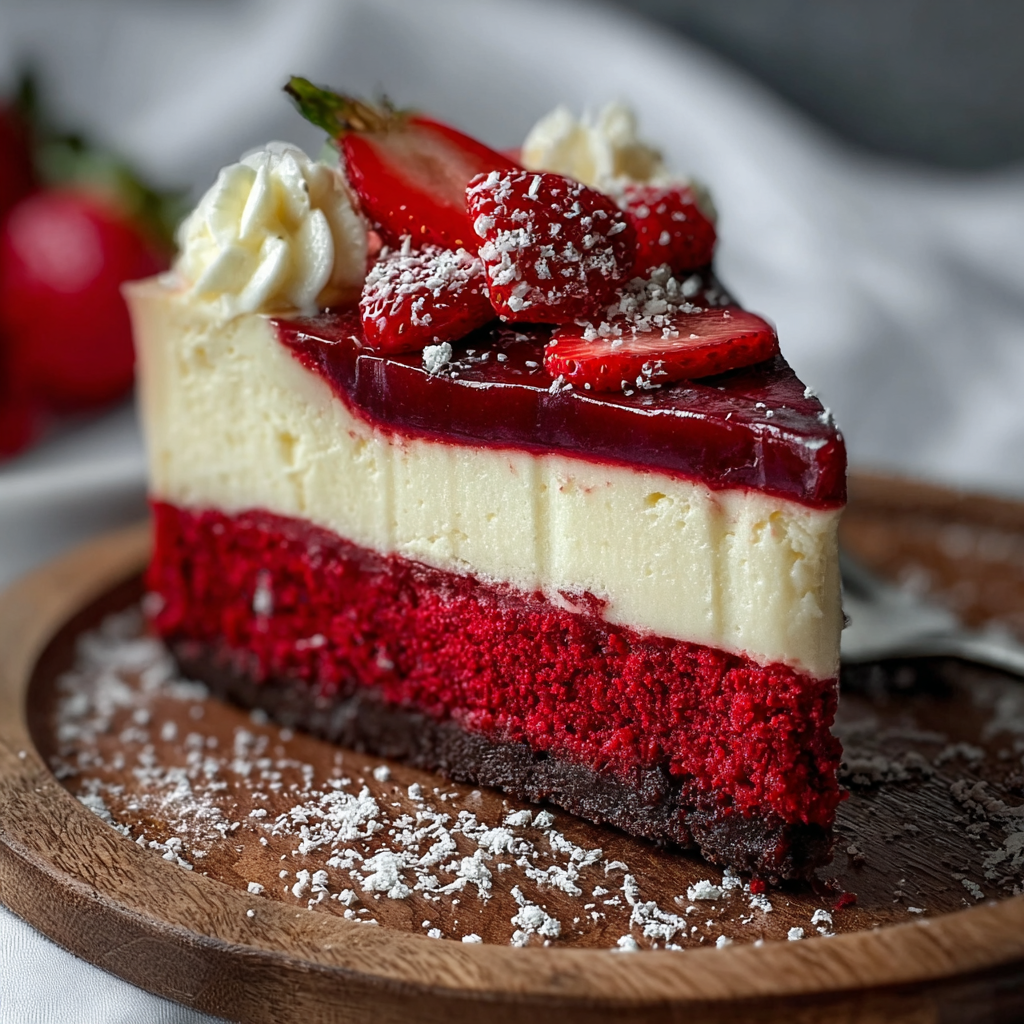
This Red Velvet Strawberry Cheesecake is one of those recipes that immediately became a centerpiece at every family gathering the first time I made it. I discovered the combination during a spring bake-off when I wanted something that felt both elegant and homey: the familiar cocoa-tinged red velvet paired with a bright, whipped strawberry cheesecake. The contrast of a tender cake base with a light, airy fruit-infused cream layer is what makes this dessert memorable — each bite gives you velvet crumb, a hint of cocoa, and a creamy strawberry finish that lingers.
There are mornings I wake wanting to recreate the exact texture of that first slice: the cake should be tender and evenly risen, not dry; the cheesecake layer should be silky and airy without any lumps; and the strawberries should be vibrant, not watery. I learned early on that room-temperature ingredients and careful whipping of the heavy cream are essential to getting that cloud-like finish. This is a dessert worth the few careful steps — it’s elegant enough for parties yet reliably satisfying on a Sunday afternoon with a cup of coffee.
Why You'll Love This Recipe
- Layered contrast: a moist red velvet base and a light strawberry cream layer deliver complementary textures and flavors.
- Made with pantry-friendly ingredients like all-purpose flour, sugar, and cocoa, plus fresh strawberries for brightness.
- Easy timeline: active prep is about 30 minutes, bake 25–30 minutes, and a 4-hour chill makes it fridge-friendly for make-ahead planning.
- Versatile presentation: garnish simply with halved strawberries or glam it up with piped whipped cream for parties.
- Family-friendly: the crowd-pleasing flavor is familiar enough for kids yet sophisticated for adults, making it ideal for birthdays and holidays.
- Adaptable: you can swap dairy elements or adjust sweetness to taste for dietary needs.
I first shared this cake at my sister’s engagement brunch and watched as everyone reached for seconds. The bright strawberries cut through the richness, and guests commented how light the cheesecake layer felt despite being indulgent — a detail that convinced me this should be my go-to celebration dessert from now on.
Ingredients
- All-purpose flour (1 1/2 cups): Use a trusted brand such as King Arthur or Gold Medal for consistent results. Spoon and level the cup to avoid compacting and ending up with a dense crumb.
- Granulated sugar (1 cup): Regular white sugar balances the tang from buttermilk and vinegar and keeps the crumb tender.
- Baking powder & baking soda (1 tsp each): These leaveners work together for lift — baking powder for even rise and baking soda to react with the buttermilk for tenderness.
- Cocoa powder (1 tbsp): Unsweetened Dutch-process or natural cocoa both work; it’s only a hint here, so choose what you prefer for color depth.
- Vegetable oil (1 cup): Oil keeps the cake moist longer than butter. Neutral oils like canola or sunflower are ideal.
- Buttermilk (1 cup, room temperature): Adds tang and reacts with baking soda. If you don’t have buttermilk, mix 1 cup milk with 1 tbsp white vinegar and rest 5 minutes.
- Eggs (2 large, room temperature): Help with structure and richness. Bringing them to room temperature helps a smoother emulsion with oil.
- Red food coloring (2 tbsp): Gel or liquid both work; gel yields more vibrant color without excess liquid.
- Vanilla extract (1 tsp): Pure vanilla enhances all flavors; use Nielsen-Massey or similar for best aroma.
- White vinegar (1 tsp): Reacts with cocoa and baking soda to deepen the velvet texture and tang.
- Cream cheese (16 oz, softened): Use full-fat for the silkiest texture. Philadelphia is a reliable choice and gives stable results when whipped smoothly.
- Powdered sugar (1 cup): Also called confectioners’ sugar; helps the filling remain smooth and not gritty.
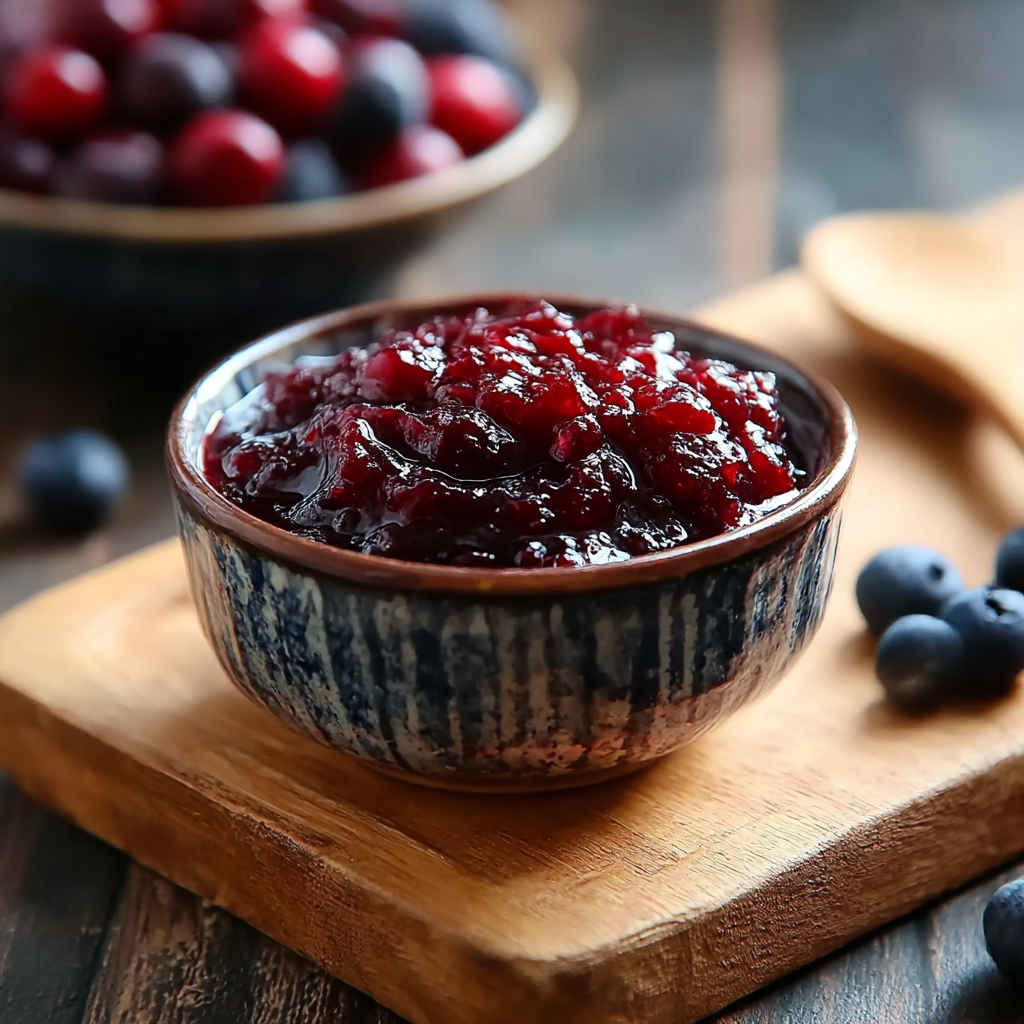
- Fresh strawberries (1 cup pureed, about 8–10): Choose ripe but firm berries so the puree is bright but not overly watery.
- Heavy whipping cream (1 cup): Chilled; whipping it to stiff peaks gives the filling loft without making it runny.
- Fresh strawberries for topping: Halved berries for garnish; optional dollops of whipped cream for extra drama.
Instructions
Preheat and prepare: Preheat the oven to 350°F (175°C). Grease a 9-inch springform pan, then line the base with parchment for easier removal. Position a rack in the center of the oven for even heat. Mix dry ingredients: Sift together 1 1/2 cups all-purpose flour, 1 cup granulated sugar, 1 teaspoon baking powder, 1 teaspoon baking soda, 1/2 teaspoon salt, and 1 tablespoon cocoa powder into a large bowl. Sifting aerates the flour and removes lumps so the cake crumb is light; whisk briefly to combine. Whisk wet ingredients: In another bowl, whisk 1 cup vegetable oil, 1 cup room-temperature buttermilk, 2 large room-temperature eggs, 2 tablespoons red food coloring, 1 teaspoon vanilla extract, and 1 teaspoon white vinegar until smooth and homogenous. The oil and eggs emulsify better if eggs are warm; this prevents streaks and ensures an even crumb. Combine batter: Gradually fold the dry ingredients into the wet mixture with a spatula, stirring until just combined. Overmixing develops gluten and can toughen the cake — stop once you see no streaks of flour. Pour into the prepared pan and smooth the top. Bake and cool: Bake for 25–30 minutes. A toothpick in the center should come out clean or with a few moist crumbs. Allow the cake to cool completely in the pan on a wire rack before removing the sides of the springform to avoid slipping or cracking. Make the strawberry cream: Beat 16 oz softened cream cheese in a large bowl until silky. Gradually add 1 cup powdered sugar and 1 teaspoon vanilla extract, mixing until smooth. Stir in 1 cup pureed fresh strawberries until fully incorporated. In a chilled bowl, whip 1 cup heavy cream to stiff peaks and gently fold into the cream cheese mixture to keep it light; avoid overfolding to maintain volume. Assemble and chill: Once the cake is completely cool, remove from the springform pan and place on the serving plate. Spread the strawberry cream evenly over the cake, smooth the top with an offset spatula, then refrigerate for at least 4 hours or until the filling is set. Longer chilling overnight helps flavors meld and makes cleaner slices. Finish and serve: Garnish with halved fresh strawberries and optional piped whipped cream just before serving. Use a hot, dry knife for clean slices — wipe between each cut for presentation.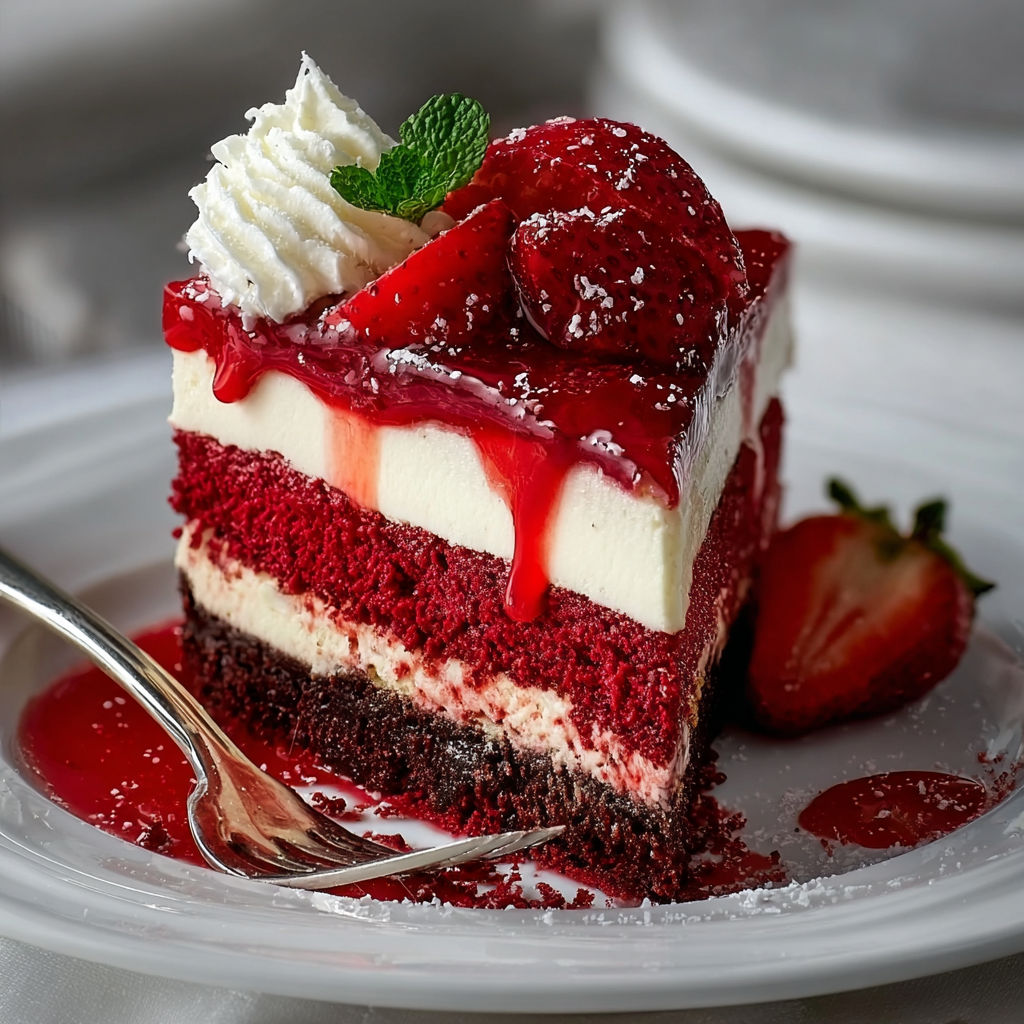
You Must Know
- The assembled dessert benefits from at least 4 hours of chilling to set the filling properly and make clean slices.
- Store in the refrigerator up to 3 days; freeze individual slices wrapped tightly for up to 3 months.
- Using full-fat cream cheese and heavy cream gives stability and the classic mouthfeel; low-fat swaps can lead to a looser set.
- This dish is high in dairy and gluten, so it is not suitable for people with those allergies unless ingredients are swapped.
One of my favorite things about this combination is how the bright strawberry puree breathes life into the rich cream cheese. At a holiday dinner, guests loved that the strawberry layer felt lighter than a traditional baked cheesecake, which meant more people went back for seconds — a sure sign of a winner in our house. The contrast is what keeps me making it year after year.
Storage Tips
Keep the layered cake covered with plastic wrap or in an airtight cake container to prevent the cheesecake layer from absorbing fridge odors and to protect the berries from drying. Refrigerated, the assembled dessert keeps well for 3 days; beyond that the strawberries may weep and the cake crumb can dry. For longer storage, slice and wrap individual portions tightly in plastic, then foil, and freeze for up to 3 months. Thaw overnight in the refrigerator and refresh a few minutes at room temperature before serving for best texture.
Ingredient Substitutions
If you need dairy-free options, use a stable dairy-free cream cheese and full-fat coconut cream whipped to stiff peaks; note the flavor will shift and the texture may be slightly looser. For a gluten-free version, swap the all-purpose flour for a 1:1 gluten-free baking flour blend and check for added xanthan gum if your blend lacks it. To reduce sugar, you can modestly cut the granulated sugar to 3/4 cup in the cake and use a powdered sugar alternative in the filling, but keep the balance so the cake still browns and the filling sets properly.
Serving Suggestions
Serve slices with a spoonful of lightly sweetened whipped cream or a dusting of fine cocoa for contrast. For a brunch spread, pair with bitter coffee or a citrus tea to cut the richness. The cake also scales well for a dessert table — consider making two 9-inch cakes and stacking them with extra strawberry cream in the middle for a celebratory layer cake. Fresh mint leaves add color, and toasted almond slivers provide a pleasing crunch.
Cultural Background
Red velvet has roots in early American baking traditions and became particularly iconic in the southern United States, celebrated for its subtle cocoa flavor and striking color. Combining it with a fruit-forward cheesecake layer takes inspiration from modern fusion patisserie, where traditional bases are reimagined with lighter mousse or cream layers. This layered approach mirrors European entremets that pair sponge layers with mousse, showcasing texture contrasts and seasonal fruit.
Seasonal Adaptations
In summer, use peak-season strawberries for the puree for maximum fragrance and color. In winter, switch to a berry compote made from frozen berries gently cooked down and cooled before folding into the cream. For fall or winter holidays, add a pinch of warm spice to the cake batter — a quarter teaspoon of cinnamon or cardamom — to complement the cream cheese and fresh berries.
Meal Prep Tips
Make the red velvet base a day ahead and keep wrapped tightly at room temperature. Prepare the strawberry cream and store it chilled, then assemble on the day you plan to serve to maintain peak texture. Transport assembled portions in a level, refrigerated container. If making multiple components for events, prepare the cake and puree up to two days ahead; whip the cream and fold it in last minute for best volume.
Whether you’re baking for guests or treating yourself, this layered dessert brings celebratory color and approachable technique together. Make it your own with different fruits or garnishes, and enjoy the way people always linger a little longer at the table when a special dessert like this appears.
Pro Tips
Bring eggs and cream cheese to room temperature for smooth emulsions and lump-free filling.
Chill mixing bowls for whipping cream to achieve stiffer peaks more reliably.
Use a hot, dry knife and wipe between slices for cleaner presentation.
Allow at least 4 hours of chilling for the filling to set — overnight is ideal.
This nourishing red velvet strawberry cheesecake recipe is sure to be a staple in your kitchen. Enjoy every moist, high protein slice — it is perfect for breakfast or as a wholesome snack any time.
Tags
Red Velvet Strawberry Cheesecake
This Red Velvet Strawberry Cheesecake recipe makes perfectly juicy, tender, and flavorful steak every time! Serve with potatoes and a side salad for an unforgettable dinner in under 30 minutes.
Ingredients
Red Velvet Cake Base
Strawberry Cheesecake Filling
Topping
Instructions
Preheat and prepare pan
Preheat oven to 350°F (175°C). Grease and line a 9-inch springform pan with parchment and set aside.
Combine dry ingredients
Sift together flour, sugar, baking powder, baking soda, salt, and cocoa powder to ensure an even, airy crumb.
Mix wet ingredients
Whisk vegetable oil, buttermilk, eggs, red food coloring, vanilla, and vinegar until smooth to create an even emulsion.
Make batter and bake
Fold dry into wet ingredients until just combined, pour into pan, and bake 25–30 minutes. Cool completely before removing from pan.
Prepare strawberry filling
Beat softened cream cheese until smooth. Add powdered sugar and vanilla, then stir in pureed strawberries. Whip heavy cream to stiff peaks and fold gently into the cream mixture.
Assemble and chill
Spread the filling over the cooled cake, smooth the top, and refrigerate at least 4 hours or overnight. Garnish with halved strawberries before serving.
Last Step: Please leave a rating and comment letting us know how you liked this recipe! This helps our business to thrive and continue providing free, high-quality recipes for you.
Nutrition
Did You Make This?
Leave a comment & rating below or tag
@kitchenfunwithmy3sons on social media!
Categories:
You might also like...

Cheesy Chicken Garlic Wraps
Golden chicken tucked into crisped tortillas with melty cheddar and mozzarella, plus a creamy garlic sauce. Weeknight-friendly and ready in 25 minutes.

Philly Steak Cheese Fries
Crispy waffle fries piled with tender sliced steak, sautéed peppers and onions, and gooey American cheese—an indulgent, shareable skillet perfect for weeknight dinners or game-day gatherings.
Old-Fashioned Pumpkin Bars with Cream Cheese Frosting
Tender, spiced pumpkin bars finished with a silky cream cheese frosting—perfect for fall gatherings, potlucks, and cozy afternoons.
Did You Make This?
Leave a comment & rating below or tag @kitchenfunwithmysons on social media!
Rate This Recipe
Share This Recipe
Enjoyed this recipe? Share it with friends and family, and don't forget to leave a review!
Comments (1)
This recipe looks amazing! Can't wait to try it.
Comments are stored locally in your browser. Server comments are displayed alongside your local comments.

Hi, I'm Sara!
What's Popular
30-Minute Meals!
Join to receive our email series which contains a round-up of some of our quick and easy family favorite recipes.