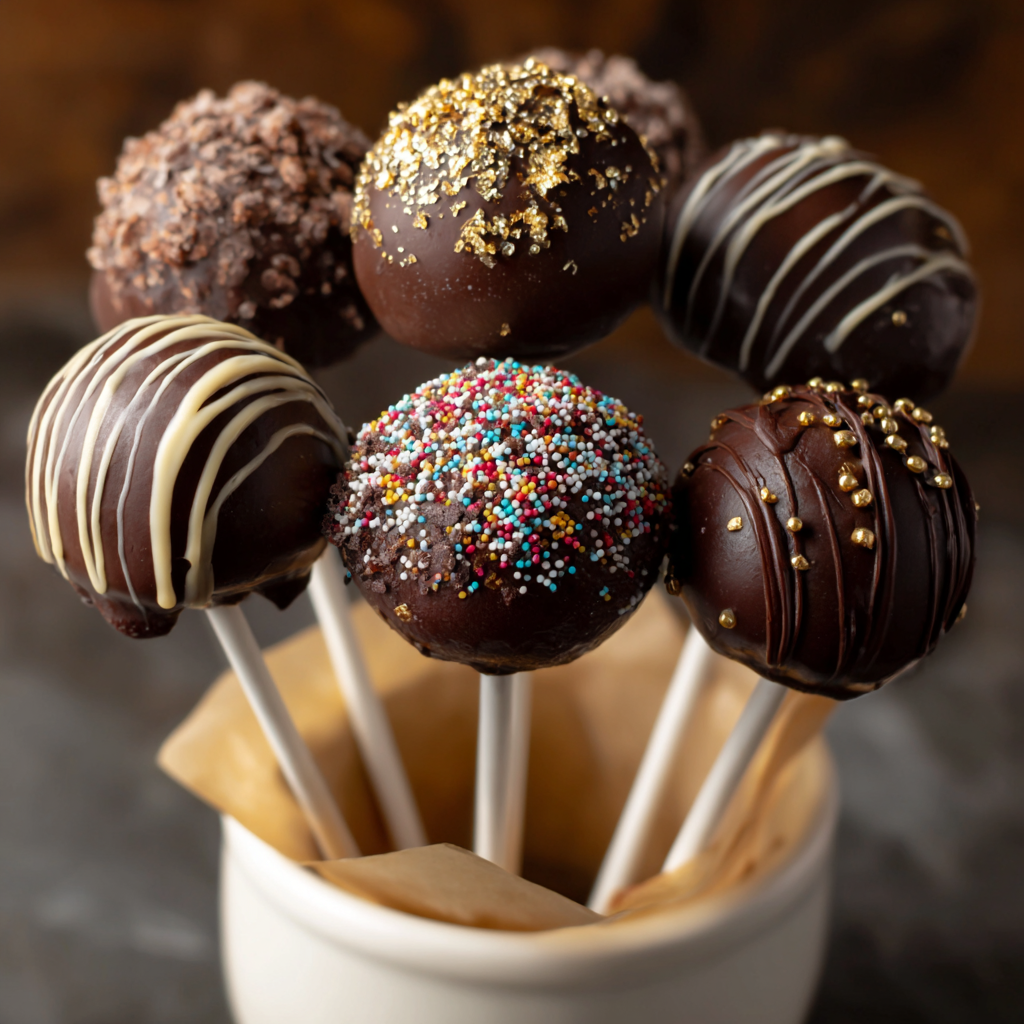
Chocolate Cake Pops

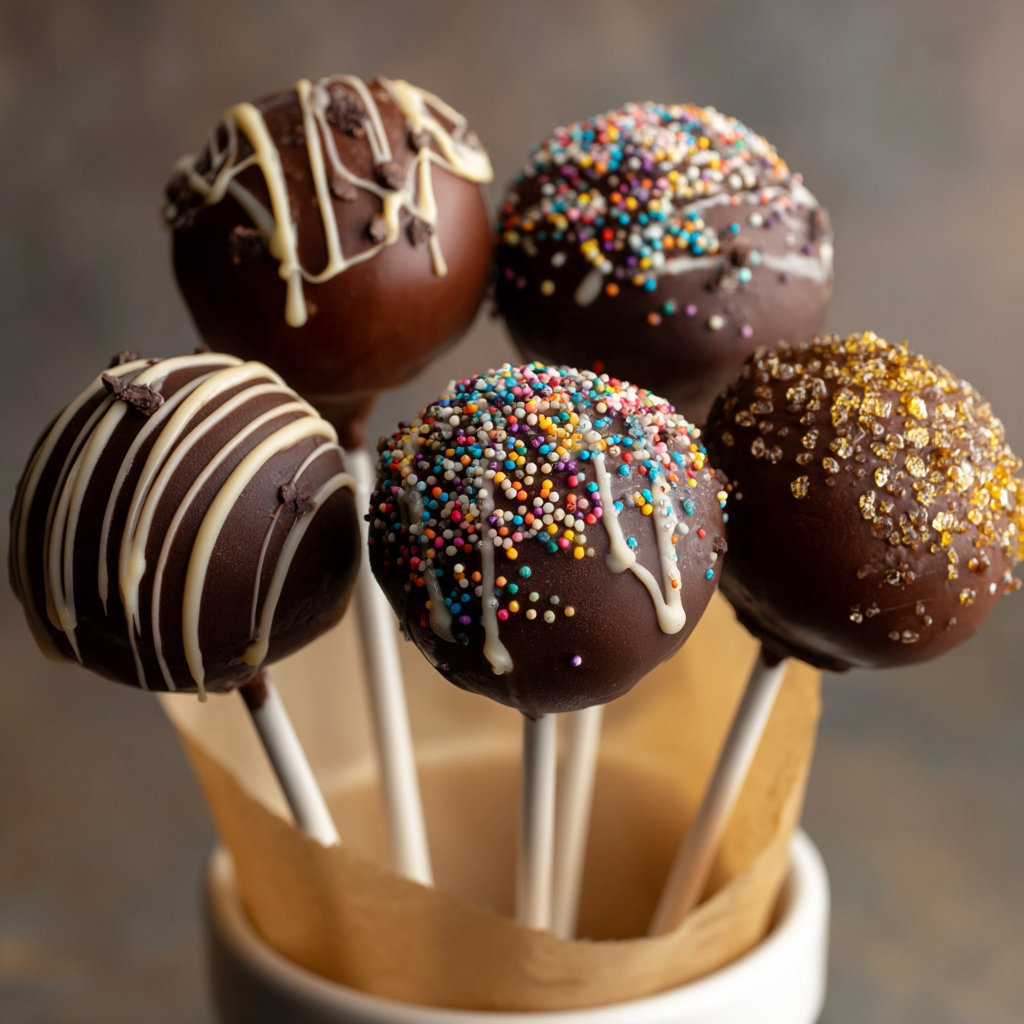
From-scratch chocolate cake crumbled into buttery frosting, shaped into perfect pops, dipped in chocolate, and finished with sprinkles—an irresistible party treat.
This recipe for chocolate cake pops has been a celebration staple in my house for years. I first made them for my daughter's preschool graduation, staying up late to roll hundreds of tiny cake balls while the house was quiet. The combination of a tender, deeply chocolatey cake and a smooth chocolate buttercream that brings the crumbs together feels like a secret handshake between cake and candy. Each pop is bite-sized comfort: moist cake wrapped in a thin, crisp chocolate shell that gives way to a soft center. The texture contrast and the nostalgic charm of decorated lollipop-style treats always get everyone smiling.
I discovered the exact proportions for the cake while experimenting with a single-pan chocolate cake that used oil for moistness and hot water to bloom the cocoa. Once I added a subtly sweet buttercream to the crumbs and chilled them until perfectly firm, the transformation into cake pops was magical. What makes these truly special is their versatility—use candy melts for quick colors, tempered chocolate for shine, or swap sprinkles to suit any party theme. I love that they're portable, crowd-pleasing, and sentimental in a way that never feels fussy.
Why You'll Love This Recipe
- Quick to assemble with pantry-friendly ingredients: a single 9-inch pan yields a tender chocolate base, and the rest is just mixing and chilling.
- Perfect for parties and gifting—makes about 40 pops, so it’s ideal for birthdays, bake sales, or anytime you want bite-sized treats.
- Make-ahead friendly: bake the cake a day in advance and form the balls ahead of time; the chilled balls are easy to dip when you’re ready.
- Customizable coating options—use candy melts for vibrant colors or semi-sweet chocolate for a richer, less sweet finish.
- Kid-approved decorating: sprinkles, crushed cookies, or colored drizzle let you tailor each pop to a theme without extra effort.
In my kitchen these are a go-to when I want something impressive with little hands-on time. Family and friends always comment on how professional they look even when I rush the decorations. They’re forgiving: if a shell cracks, a little extra drizzle hides it and still tastes wonderful.
Ingredients
- All-purpose flour: 1 cup, spooned and leveled. Use a reliable brand like King Arthur for consistent results; flour provides structure while still allowing the cake to stay tender.
- Granulated sugar: 1 cup for balanced sweetness and tender crumb—C&H or Domino work well.
- Unsweetened cocoa powder: 6 tablespoons (about 1/3 cup + 1 tablespoon). Choose natural or Dutch-process depending on preference; natural gives a brighter chocolate note, Dutch-process is mellower.
- Baking soda & salt: 1/2 teaspoon baking soda and 1/4 teaspoon salt to leaven and enhance flavor.
- Oil: 1/2 cup canola, vegetable, or melted coconut oil. Oil keeps the cake moist even after chilling and forming into balls.
- Eggs: 2 large at room temperature to emulsify and build structure.
- Vanilla extract: 1 teaspoon for flavor depth.
- Hot water: 1/2 cup—wakes up the cocoa and yields a smooth, tender batter.
- Frosting (to bind): 6 tablespoons unsalted butter, 3/4 cup confectioners’ sugar, 1/2 cup unsweetened cocoa, 2–3 teaspoons heavy cream or milk, 1/2 teaspoon vanilla.
- Coating: 24 ounces candy melts or chopped semi-sweet chocolate. Add a little vegetable oil if using chopped chocolate to thin it for easier dipping.
- Finishes: Sprinkles or other decorations—choose small, non-melting sprinkles for best results.
Instructions
Preheat and prepare: Preheat the oven to 350°F (177°C). Grease a 9-inch round, square, or springform pan and line with parchment if desired. Proper pan prep prevents sticking and helps the cake release cleanly after baking. Mix dry ingredients: In a large bowl whisk together 1 cup flour, 1 cup granulated sugar, 6 tablespoons cocoa powder, 1/2 teaspoon baking soda, and 1/4 teaspoon salt until evenly combined. Thorough whisking eliminates lumps and ensures even rise. Combine wet ingredients: In a separate bowl whisk 1/2 cup oil, 2 large eggs, and 1 teaspoon vanilla. Add the wet mixture to the dry, then pour in 1/2 cup hot water and whisk until smooth. The hot water blooms the cocoa for a deeper chocolate flavor and thins the batter for a moist crumb. Bake the cake: Pour batter into the prepared pan and bake for 25–27 minutes, or until a toothpick inserted into the center comes out clean. Let the cake cool completely in the pan on a wire rack—this prevents condensation that would moisten the crumbs too much. Make the binding mixture: Beat 6 tablespoons softened butter until creamy. Add 3/4 cup confectioners’ sugar, 1/2 cup cocoa, 2 teaspoons cream, and 1/2 teaspoon vanilla on low until incorporated, then beat on high for 2–3 minutes. If the buttercream seems too stiff to combine with crumbs, add the remaining teaspoon of cream. Combine cake and frosting: Crumble the cooled cake into a large bowl, removing any large hard edges. Add the frosting and mix on low until evenly combined into a moist, scoopable mixture. The goal is uniform texture without large lumps. Form and chill: Measure about 1 scant tablespoon (roughly 20 g) of mixture and roll into balls. Arrange on a lined baking sheet and chill in the refrigerator for 2 hours or freeze for 1 hour until firm—very cold centers reduce cracking when dipping. Melt the coating: Melt 24 ounces of candy melts or chopped chocolate in a 2-cup liquid measuring cup in 20-second microwave bursts, stirring between each, until smooth. Allow to cool slightly—warm but not hot—to avoid cracking the coating when dipping. Dip and decorate: Dip one end of a lollipop stick about 1/2 inch into the coating, insert into a cake ball about halfway, then dunk the ball to coat. Tap off excess and add sprinkles while coating is still wet. Set upright in a foam block or styrofoam and let set completely, about an hour. Work with only a few chilled balls at a time to keep centers cold. Store: Once set, store pops upright in the refrigerator for up to 1 week or freeze for up to 6 weeks. Thaw overnight in the refrigerator before serving.
You Must Know
- These are high in sugar and calories—store in the refrigerator and enjoy sparingly as a treat.
- Finished pops freeze well for up to 6 weeks; thaw in the refrigerator to preserve texture and prevent condensation on the coating.
- Use chilled cake balls when dipping: warm centers will cause the coating to crack as it contracts.
- If using real chocolate, add 1/2 teaspoon vegetable oil per cup when melting to achieve a thinner, easier-to-dip consistency.
My favorite thing about these pops is how adaptable they are—I've made them for holidays, school events, and wedding favors. Children crowd around the decorating table, and adults love the nostalgic bite. The mix of science (temperature control) and simple creativity (sprinkles and drizzle) keeps me engaged every time I make them.
Storage Tips
Store finished pops upright in an airtight container in the refrigerator for up to one week. Use a single layer to avoid damaging decorations—styrofoam or a cake pop stand works best. For longer storage, freeze the set pops in a single layer on a baking sheet for a few hours, then transfer to a freezer-safe container separated with parchment. Thaw overnight in the refrigerator before serving to avoid condensation on the shell. If you need to transport pops, pack them upright with soft padding to prevent rattling and chipping.
Ingredient Substitutions
If you prefer a dairy-free version, substitute vegan butter and dairy-free milk in the frosting, and choose dairy-free chocolate or candy melts for coating. For gluten-free, swap in a 1:1 gluten-free baking flour blend—note that texture may vary slightly and you may need to add a teaspoon of xanthan gum if your blend lacks it. To make less sweet pops, use semi-sweet chocolate for the coating and cut the confectioners’ sugar in the frosting by 1–2 tablespoons, tasting as you go.
Serving Suggestions
Serve at room temperature for best flavor and texture. These are ideal on a dessert table alongside cupcakes and cookies, or as a sweet favor packaged in cellophane. Garnish with finely chopped nuts, toasted coconut, or a contrasting chocolate drizzle for an elegant touch. For a party, make rainbow colors with tinted candy melts or match holiday colors—red and green for Christmas, pastel shades for baby showers.
Cultural Background
While the concept of cake formed into bite-size shapes and coated in chocolate is modern and largely popularized by American bakers and candy artisans, the idea ties back to classic truffles and petit fours—small, ornate sweets meant to be enjoyed in one or two bites. Cake pops as we know them became an internet sensation in the early 2010s, popularized by creative bakers who combined cake crumbs with frosting to create portable, decorated treats. Today they blend home baking with confectionery techniques.
Seasonal Adaptations
Adjust colors and flavors for the season: add a teaspoon of espresso powder to the cake for winter warmth, fold orange zest into the batter for a bright holiday pop, or swap in peppermint extract and crushed candy canes for festive crunch. For summer gatherings, dip in white chocolate and top with toasted coconut or dried fruit bits. The basic method remains the same—only the decorations and flavorings change.
Meal Prep Tips
Prepare the cake a day ahead and keep it wrapped at room temperature. The next day, form and chill the balls—this splits the work into manageable steps. Melt coating fresh when you’re ready to dip so it stays fluid. Pack finished pops in layers separated by parchment for quick grab-and-go snacks or to portion for lunches. Making multiple batches of coating in different colors ahead of time speeds up decorating for events.
These chocolate pops bring a little ceremony to everyday life—simple ingredients transformed into celebratory bites that hold memories. I hope you enjoy making them as much as I do; customize the look and flavors to make them your own and share the joy with friends and family.
Pro Tips
Chill cake balls thoroughly before dipping—cold centers reduce cracking and help the coating set smoothly.
Use a 2-cup glass measuring cup for melting and dunking; the narrow opening makes it easier to coat and reduces drips.
Work with only 2–3 cake balls at a time while dipping to keep the rest cold and firm.
This nourishing chocolate cake pops recipe is sure to be a staple in your kitchen. Enjoy every moist, high protein slice — it is perfect for breakfast or as a wholesome snack any time.
FAQs about Recipes
Can I dip the cake balls right after rolling them?
Yes. Chill the balls in the refrigerator for 2 hours or freeze for 1 hour before dipping so they are firm and less likely to crack when coated.
How long do cake pops keep?
Store finished pops upright in the refrigerator for up to 1 week or freeze for up to 6 weeks. Thaw overnight in the refrigerator before serving.
Tags
Chocolate Cake Pops
This Chocolate Cake Pops recipe makes perfectly juicy, tender, and flavorful steak every time! Serve with potatoes and a side salad for an unforgettable dinner in under 30 minutes.
Ingredients
Cake
Frosting (binder)
Coating & Decorations
Instructions
Preheat and prepare
Preheat oven to 350°F and grease a 9-inch pan. Proper pan prep prevents sticking and promotes even baking.
Mix dry ingredients
Whisk flour, sugar, cocoa, baking soda, and salt until evenly combined to ensure a uniform crumb.
Combine wet ingredients
Whisk oil, eggs, and vanilla, then add to dry ingredients with hot water to bloom the cocoa and thin the batter.
Bake
Pour batter into the prepared pan and bake 25–27 minutes or until a toothpick comes out clean. Cool completely in the pan on a wire rack.
Make frosting
Beat butter, confectioners' sugar, cocoa, cream, and vanilla until smooth—adjust cream as needed for a spreadable consistency.
Combine and form balls
Crumble cooled cake into a bowl, mix in frosting until uniform, then measure about 1 scant tablespoon and roll into balls. Chill 2 hours or freeze 1 hour.
Melt coating
Melt candy melts or chopped chocolate in a 2-cup measuring cup in 20-second intervals, stirring between each until smooth. Cool slightly before dipping.
Dip and decorate
Dip the lollipop stick into coating, insert into chilled ball, then coat the ball fully. Tap off excess and add sprinkles while coating is wet. Let set upright until firm.
Store
Store pops upright in the refrigerator for up to 1 week or freeze for up to 6 weeks; thaw in the refrigerator before serving.
Last Step: Please leave a rating and comment letting us know how you liked this recipe! This helps our business to thrive and continue providing free, high-quality recipes for you.
Nutrition
Did You Make This?
Leave a comment & rating below or tag
@sararecipes on social media!
Categories:
You might also like...

10 Minute Immune Boosting Broth
A bright, restorative broth ready in ten minutes—packed with garlic, ginger, miso and turmeric to support immunity and soothe the soul.
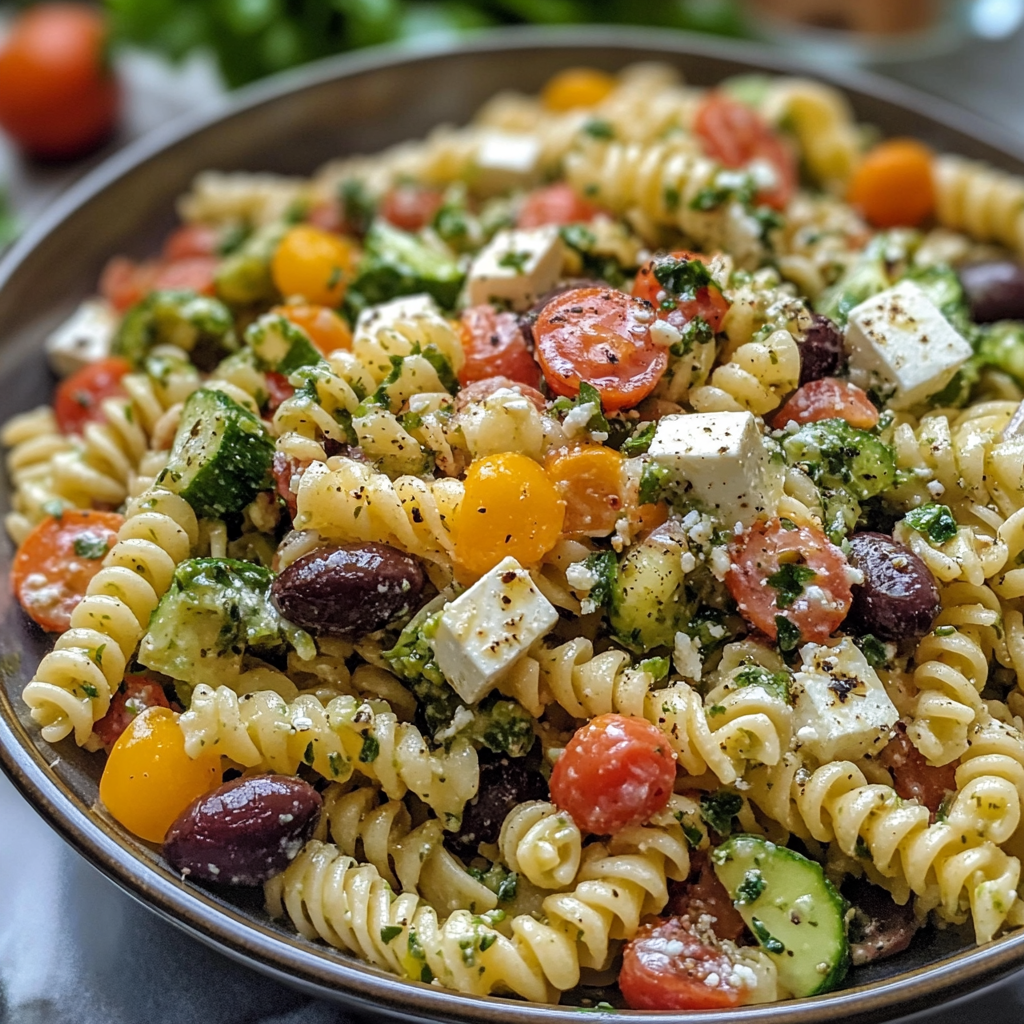
20-Minute Greek Pasta Salad
A bright, 20-minute Greek pasta salad loaded with crisp cucumber, cherry tomatoes, Kalamata olives, feta, and a tangy tzatziki vinaigrette — perfect for summer gatherings or easy meal prep.
Air Fryer Bang Bang Salmon Bites
Crispy-tender salmon bites tossed in a creamy, sweet-spicy bang bang sauce — ready in about 20 minutes using an air fryer or oven.
Did You Make This?
Leave a comment & rating below or tag @sararecipes on social media!
Rate This Recipe
Share This Recipe
Enjoyed this recipe? Share it with friends and family, and don't forget to leave a review!
Comments (1)
This recipe looks amazing! Can't wait to try it.
Comments are stored locally in your browser. Server comments are displayed alongside your local comments.
Hi, I'm Sara!
What's Popular
30-Minute Meals!
Join to receive our email series which contains a round-up of some of our quick and easy family favorite recipes.